middleportal.com – Sugar waxing, a time-honored hair removal technique, has gained renewed popularity due to its natural ingredients and ease of use. While traditional sugar wax can be purchased from beauty stores, creating your own offers a cost-effective and customizable alternative. This guide delves into the art of DIY sugar wax, providing a step-by-step recipe, safety considerations, and helpful tips for successful hair removal.
Gathering the Essential Ingredients
Before embarking on your sugar wax-making journey, ensure you have the following ingredients:
- 1 cup granulated sugar
- ¼ cup lemon juice
- ¼ cup water
Optional ingredients:
- 1 tablespoon salt
- Honey
The Sugar Wax Creation Process
Combine and Heat: In a medium saucepan, combine the granulated sugar, lemon juice, and water. Place the saucepan over medium-high heat and stir constantly.
Frothy Transformation: Continue stirring until the mixture becomes frothy and bubbles start to form. This indicates that the sugar is dissolving and the syrup is thickening.
Dissolution and Golden Hue: Maintain stirring until the sugar completely dissolves and the wax turns a rich golden brown color. This typically takes around 5-7 minutes.
Heat Removal and Cooling: Once the desired color is achieved, immediately remove the saucepan from heat. Carefully transfer the hot wax to a heatproof glass container. Place the container in an ice bath to expedite the cooling process.
Microwave Method: A Quick Alternative
For a quicker and more convenient approach, you can utilize a microwave:
Combine and Microwave: In a tall, microwavable glass container, combine the granulated sugar, lemon juice, and water. Heat the mixture in 30-second intervals, stirring after each interval, until the wax reaches a golden brown color.
Cooling Phase: Allow the wax to cool completely before using it for hair removal.
Safety Considerations
Heat Precautions: Exercise caution when handling hot wax, as it can cause severe burns. Use heat-resistant gloves and utensils during the preparation process.
Skin Sensitivity Test: Before applying sugar wax to a larger area, conduct a patch test on a small, inconspicuous area of skin to check for any sensitivity or allergic reactions.
Skin Temperature: Apply sugar wax only to clean, dry skin that is at room temperature. Avoid using it on irritated or sunburned skin.
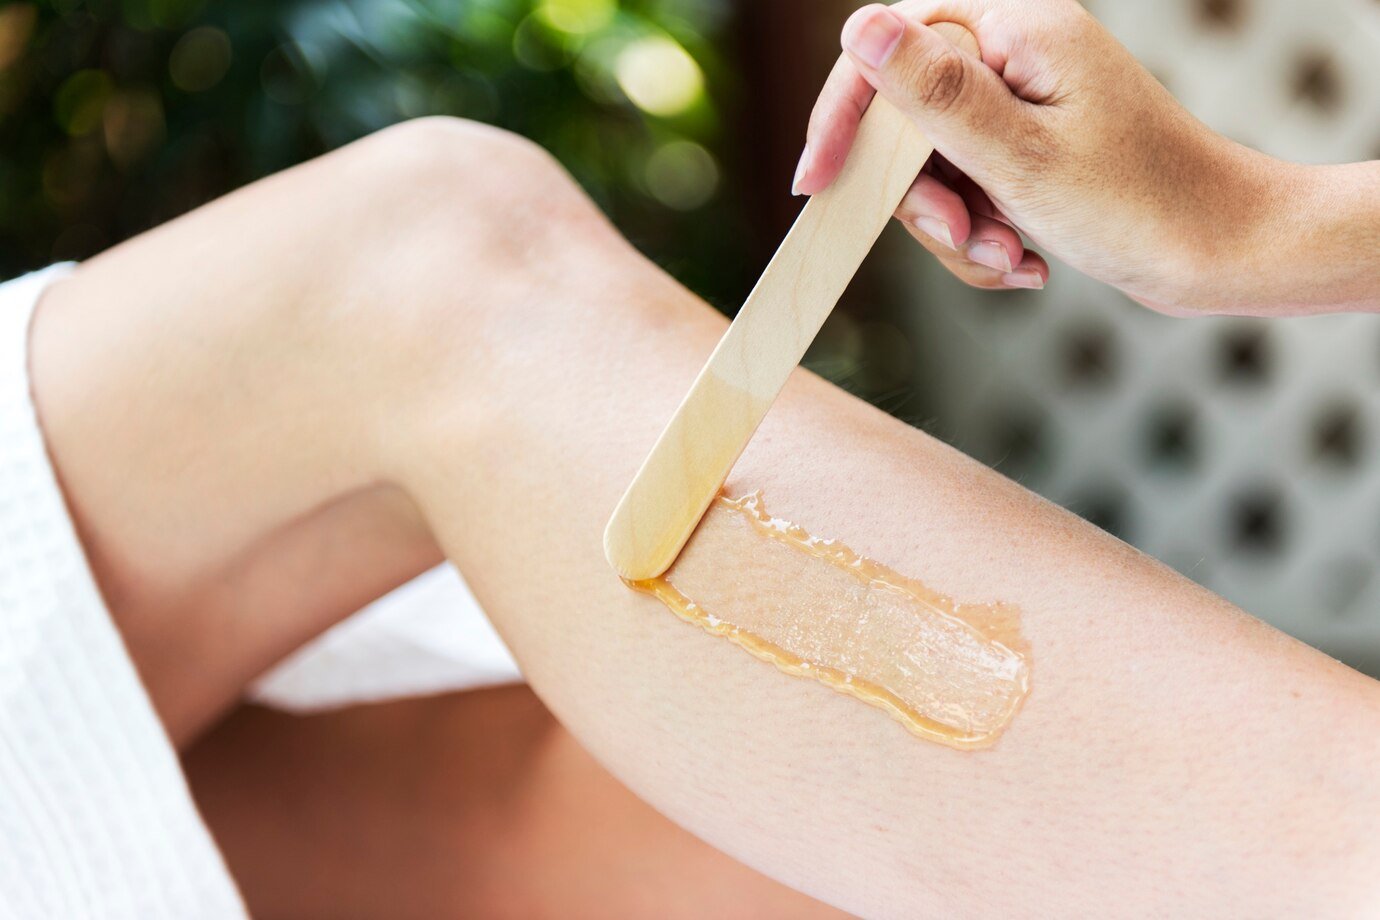
Effective Hair Removal Techniques
Direction of Hair Growth: Apply the sugar wax in the direction of hair growth using a spatula or your fingers.
Wax Strip Application: Place a wax strip over the applied wax and press it down firmly.
Rapid Removal: Pull the wax strip off quickly in the opposite direction of hair growth.
Repeat the Process: Repeat the process in small sections until the desired area is hair-free.
Conclusion
DIY sugar wax offers a simple and cost-effective way to achieve smooth, hair-free skin. By following the provided recipe and safety guidelines, you can safely create your own sugar wax and enjoy the benefits of this natural hair removal method. Remember to always perform a patch test before applying the wax to a larger area and follow proper hair removal techniques for optimal results.